All Administrators
Management of staff members with access to the admin panel
What is it?
The All Administrators section is where you can manage staff members' access to the platform. Here you can create users, assign roles and permissions, and control which sales channels each team member can access.
This screen lets you manage who can view and manage your information, what actions they can perform based on their role, and ensure each team member has appropriate access to your platform.
Available Roles
When creating a user, you can assign one of the following roles based on their function in your team:
| Role | Function |
|---|---|
| Administrator | Full platform access. Can manage users, settings, and all operations. |
| Manager | Operational management of events, bookings, and finances. No access to global settings. |
| Door Attendant | Entry control at events. Can verify tickets and manage attendance. |
| Promoter | Event sales and promotion. Has limited access to manage their promotions. |
| CS Level 1 | Basic customer service. Can answer simple queries and perform limited actions. |
| CS Level 2 | Advanced customer service. Can resolve complex issues and perform higher-level actions. |
Form Fields
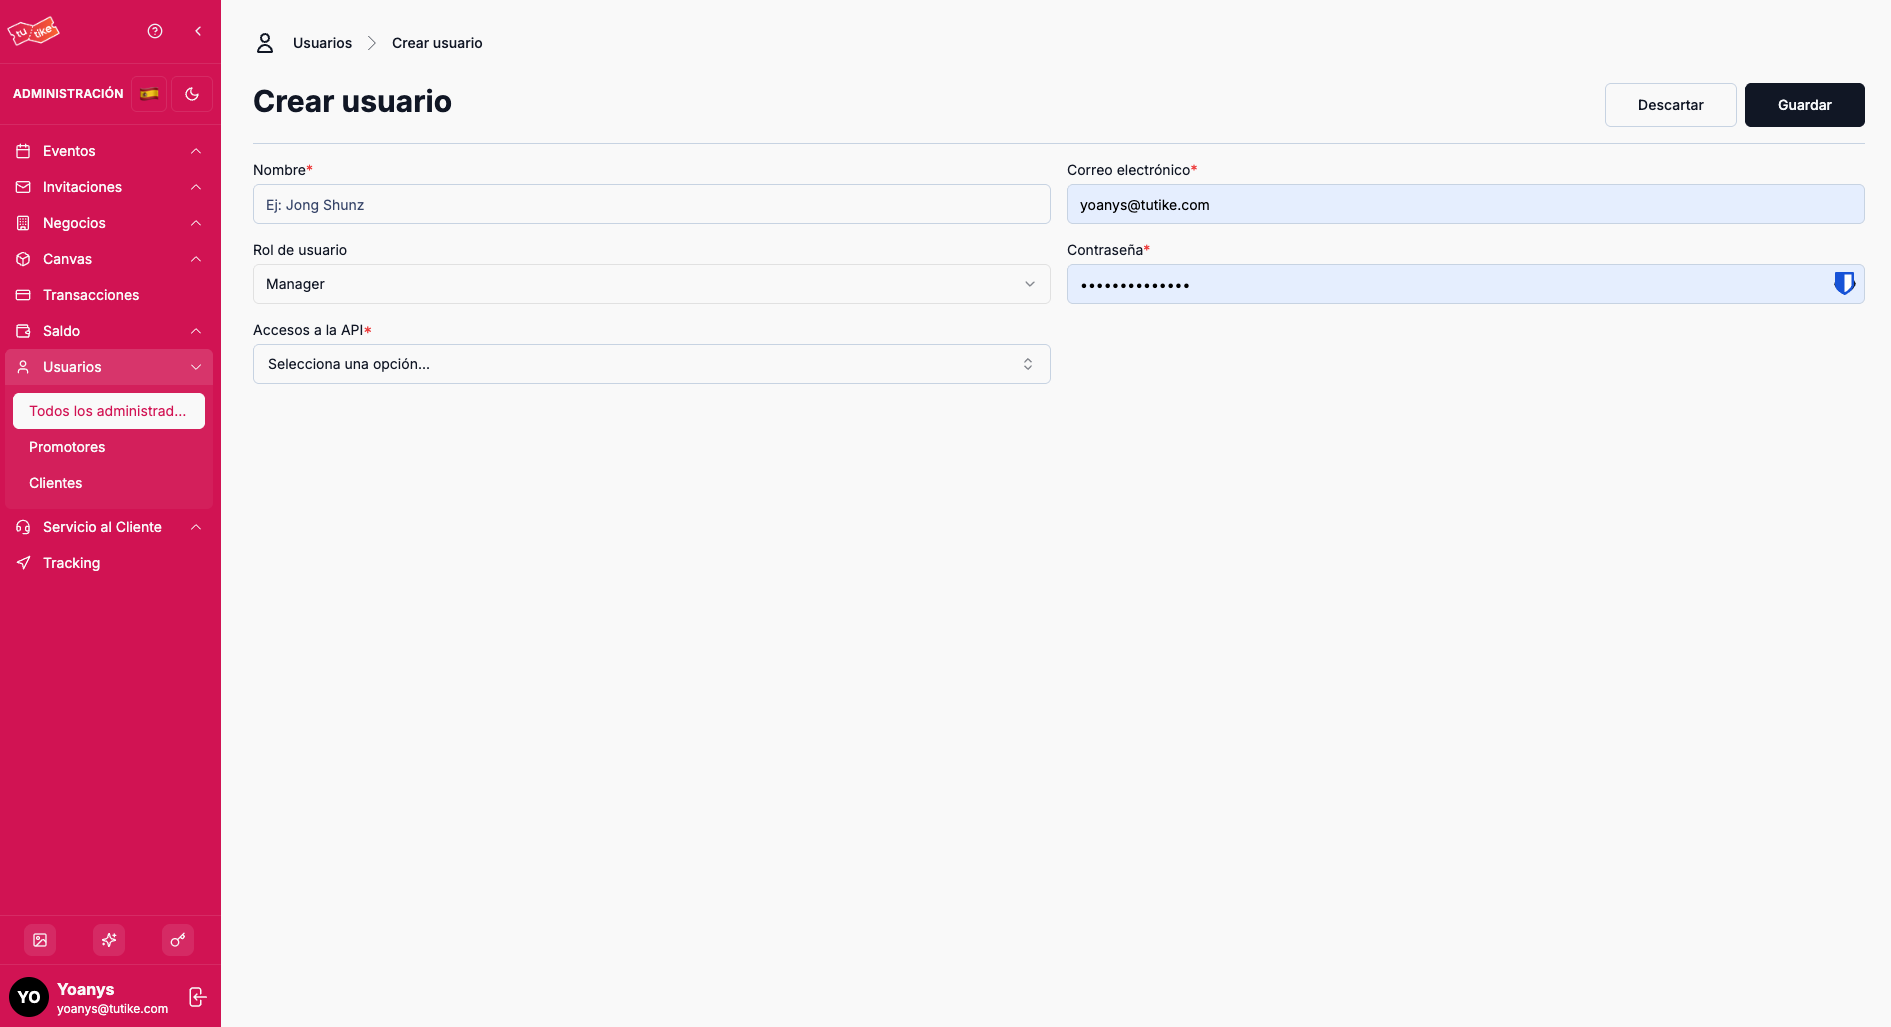
When creating or editing a user, you must complete the following information:
| Field | Required | Description |
|---|---|---|
| Name | Yes | Full name of the staff member |
| Yes | Email address they will use to access the platform | |
| Role | Yes | Role the user will have within the system |
| Password | Yes (on create) | Access password. Editable when modifying an existing user |
| API Accesses | Conditional | Sales channels or APIs the user will have access to. Required for Manager, Door Attendant, Promoter, and CS Level 1 |
API Accesses defines which sales channels or APIs the user has access to. It is mandatory to assign it to roles that interact with distribution channels to control which events or businesses each team member can manage.
Available Filters
At the top of the screen you will find the following filters to customize the view:
| Filter | Description |
|---|---|
| Search | Search bar to find a specific user by name or email |
| Status | Filter to search users by status (active / inactive) |
| Role | Filter to search users by specific role |
| API Access | Filter to search users belonging to a specific API Access |
Create New User Button
At the top right you will find the "Create new" button. Clicking it will take you to the user creation page where you can register a new team member.
User Creation Fields
On the user creation page you must complete:
| Field | Description |
|---|---|
| Name | Full name of the user |
| Email address they will use to access the platform | |
| Role | Role the user will have within the system |
| Password | Access password for the platform |
| API Access | API Access this user will be given access to. This defines the scope of events the user can view and manage |
Users Table
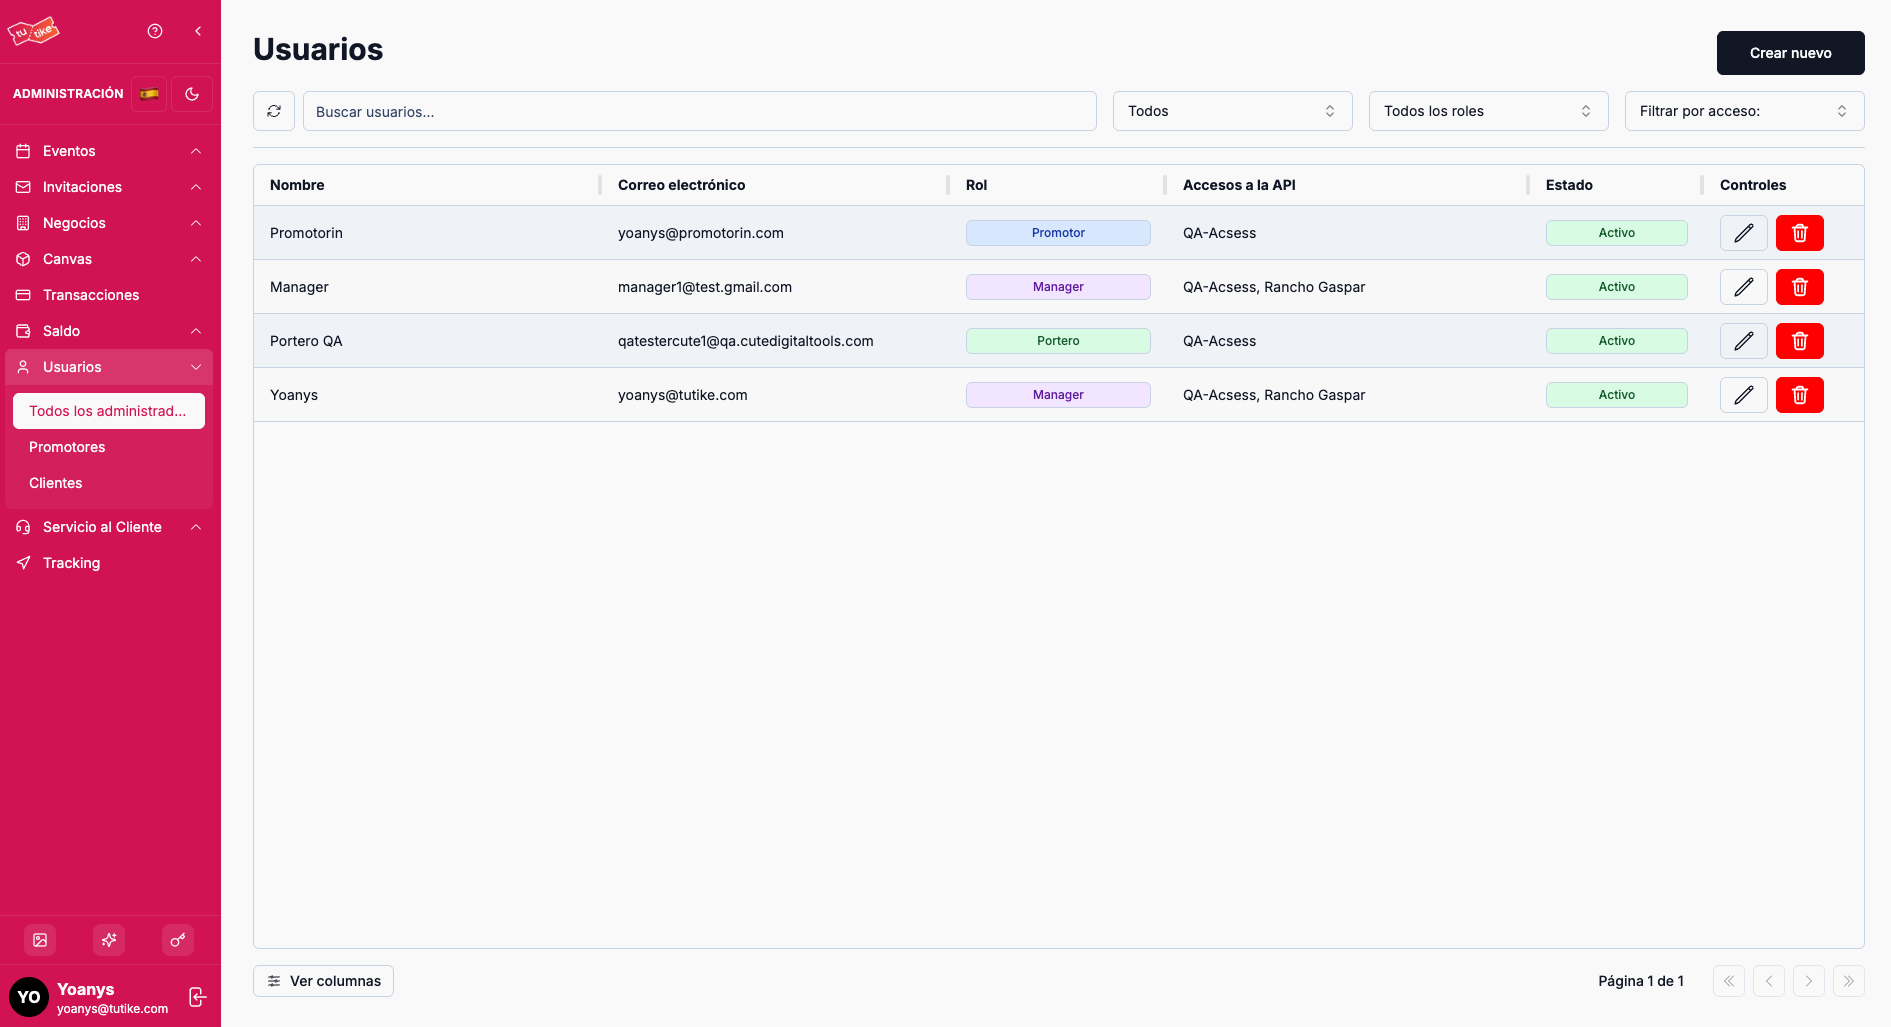
The main table shows the list of all users with the following columns:
| Column | Description |
|---|---|
| Name | Full name of the user |
| User's email address | |
| Role | Role assigned to the user within the system |
| API Access | API Access the user has access to (scope of events they can view) |
| Status | Current status of the user (active / inactive) |
| Controls | Available options to manage the user |
Available Controls
In the controls column you will find the following options:
| Action | Description |
|---|---|
| Edit | Modify the user's data (name, email, role, password, or API access) |
| Deactivate | Restricts the user's access to the platform. The user is not deleted, only deactivated and will no longer be able to access |
When you deactivate a user, they will temporarily lose access to the platform. The user remains in the system and can be reactivated in the future if needed. This action is reversible.
Available Actions
From this screen you can perform the following actions:
| Action | Description |
|---|---|
| List users | View all system users with pagination |
| Search | Quick search by name or email |
| Create user | Register a new team member |
| Edit user | Modify data, role, password, or accesses for an existing user |
| Delete user | Remove a user from the system (requires confirmation) |
When you delete a user, they will lose all access to the platform. This action is destructive and cannot be undone. Make sure you truly want to delete the user before confirming.
What is it for?
This section lets you:
- Manage your team: Create users for new staff members and assign them appropriate roles
- Control access: Decide who can view and manage what information based on their role
- Assign permissions: Give different access levels based on each team member's function
- Manage channels: Control which sales channels each user has access to
- Maintain security: Revoke access for members who leave the team or change roles when someone's function changes