Canvas
Visual editor for designing seat, table, and reservable zone maps
What is it?
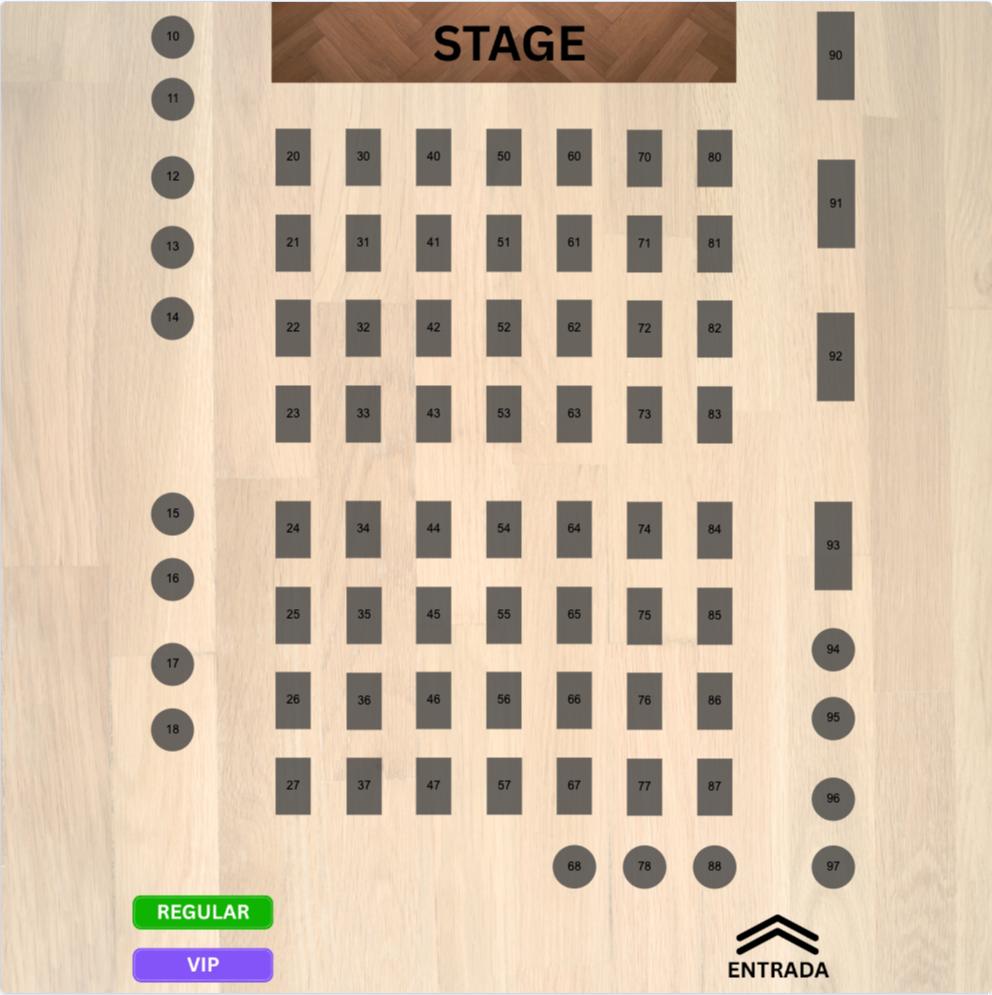
The canvas editor is the visual tool for designing a venue's floor plan and defining exactly which elements (seats, tables, zones) are reservable. It is what the end customer sees when selecting their spot at a canvas-type event.
Each canvas belongs to a location and can be reused across multiple events.
Canvas listing
Table with all existing floor plans. Visible columns:
- Name of the canvas
- Location it belongs to
- Controls: Edit, Clone, Delete
Filters and search
- Search: by canvas name
- Filter by location: search canvases by location
Available controls
- Edit: modify the canvas
- Clone: duplicate a complete canvas to avoid building from scratch
- Delete: remove the canvas (cannot be deleted if it is being used in an event)
Create a canvas
To create a new canvas you only need:
- Name: canvas name
- Link location: select the location the canvas will belong to
When the canvas is created, the system automatically takes you to the editing page.
Visual editor
The editor has a square area where you design the map and a set of tools to add elements.
Simple elements
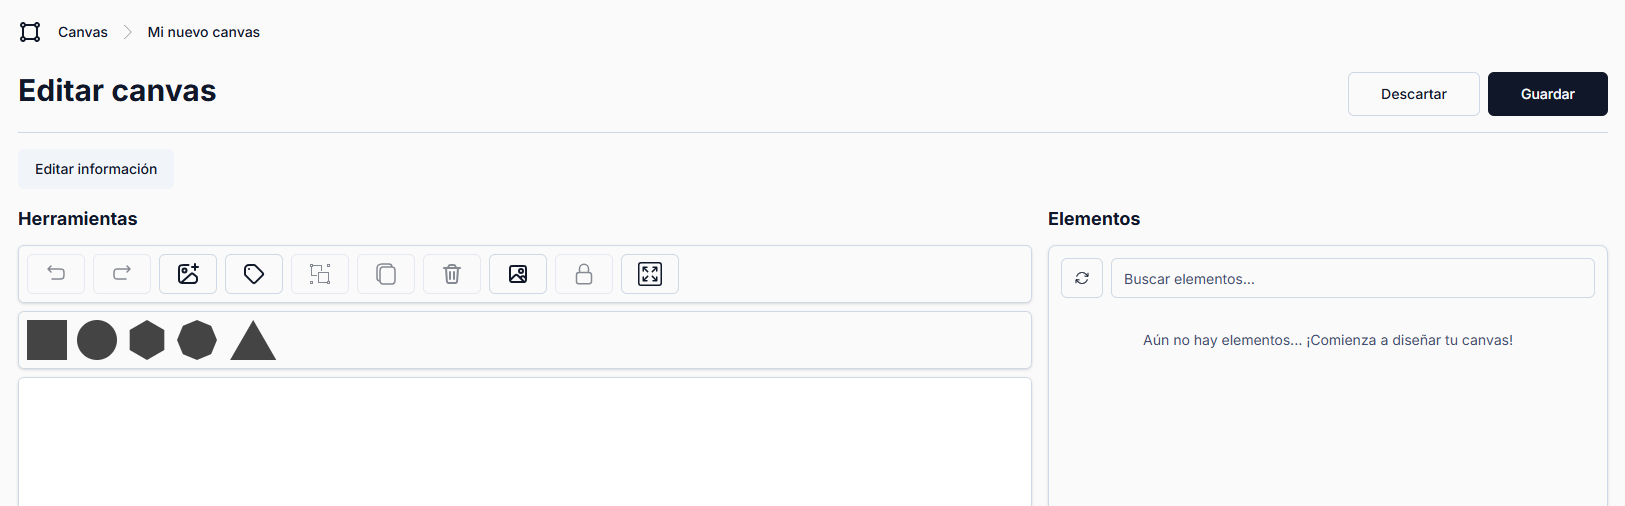
You can add the following basic shapes to the map:
- Square
- Circle
- Hexagon
- Octagon
- Triangle
Each element you add to the map can be:
- Dragged to the desired position
- Resized (enlarged or shrunk)
- Deformed
Images
You have two options for adding images to the map:
- Image as element: adds an individual image to the map (e.g. icons, logos)
- Image as background: sets a background image for the entire map
Labels
You can add text labels to the map to indicate zone names or additional information. This label is different from the individual label of each element.
Group elements
If you want multiple elements to be selected together by the user, you can group them:
- Select all the elements you want to group with the mouse
- Click group
- The elements will behave as a single element that you can drag and place wherever you want
Duplicate elements
You can duplicate elements to avoid recreating them from scratch. When you duplicate an element, you get an identical copy that you can drag to the desired position.
Zoom and lock
- Zoom in / Zoom out: zoom in or out on the map view
- Lock map: lock the map to prevent accidental changes
Element configuration
Each element you create on the map has the following characteristics:
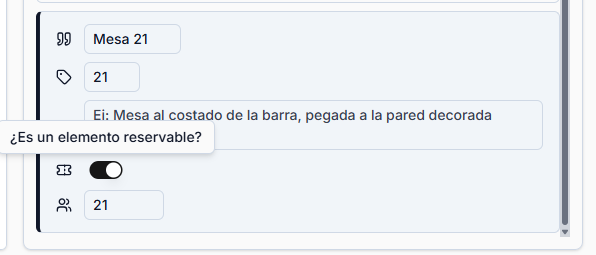
Two labels
Each element has two different labels:
- Element label: appears above the element on the map. Normally a small number or code (e.g. "21"). Useful when the map is small and a longer text would not fit.
- Element description: appears in the reservation details, the confirmation dialog, and the reservation PDF (e.g. "Table 21"). More understandable for the user.
Optional description
An optional field where you can include additional information about the element. For example: "This reservation includes a complimentary welcome drink." This information appears in the table details shown to the user when they confirm their reservation.
Reservable
Toggle that indicates whether the element is reservable or not. Useful for adding elements that give context to the map but are not reservable, such as:
- The bar
- Restrooms
- Entrances
- Exits
Capacity (legacy element)
This field indicates how many people the element is for. It is currently a legacy feature that is maintained but no longer used, as this information is now obtained from the price assigned to the element.