Create & Edit Business
How to register or modify an establishment on the platform step by step
What is creating a business?
Registering a business adds a new establishment so it can receive reservations from the platform. The creation form consists of four sections completed in order: details, address, schedules, and configuration.
Editing a business works exactly the same as creating one. Therefore, by explaining the creation process here, the editing process is fully explained.
Step 1 — Details
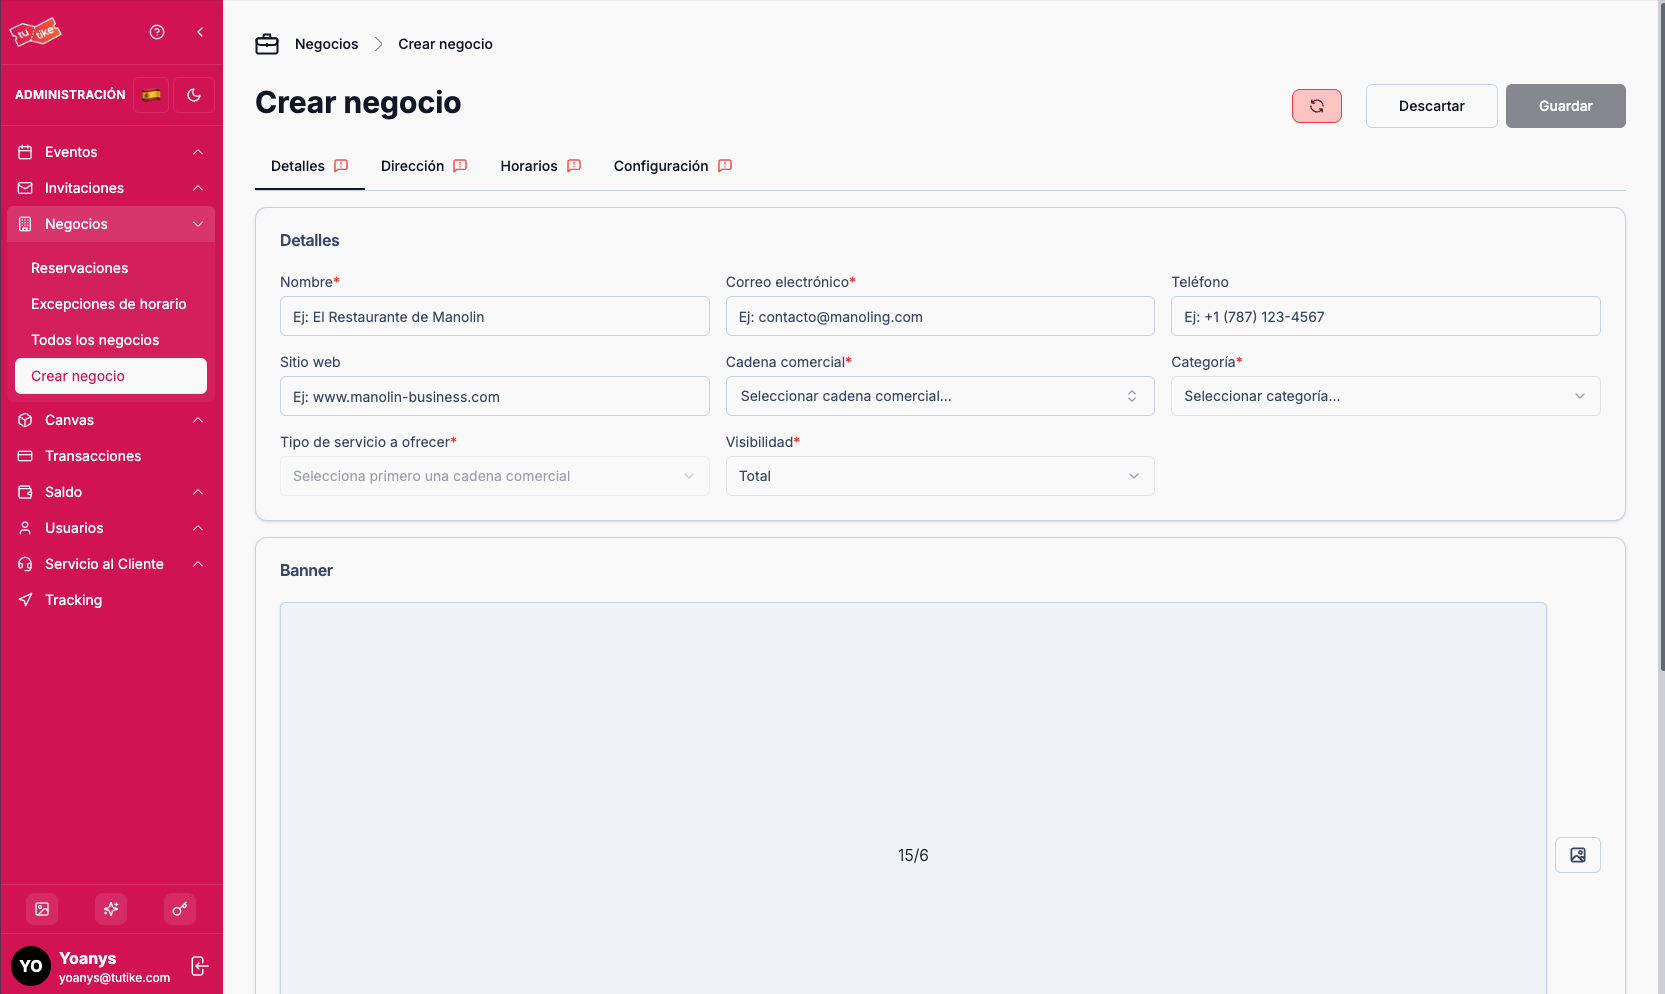
In this section you enter the basic information for the business:
| Field | Description |
|---|---|
| Name | Name of the establishment |
| Business contact email | |
| Phone | Service number (optional) |
| Website | Business website URL (optional) |
| Business chain | Chain the business belongs to |
| Category | Type of establishment (restaurant, café, catering, food truck, insurance agency, marketing agency, etc.). Currently only the "Restaurant" category has Google integration |
| Service type | Type of service to offer. Depends on the selected category. Currently restricted to "Dinner reservation" |
| Visibility | Full (the business is shown on the TuTike website) or Reduced (does not appear on TuTike but remains active for reservations) |
| Banner | Representative image of the business in 15:6 ratio. This banner appears in the WordPress plugin, in the business booking component, showing a card with the banner, logo, business title, and "Book now" button |
| Terms and conditions | Text with the business's terms. Appears on the business landing page on the TuTike website |
Step 2 — Address
Configure the physical location of the business:
| Field | Required | Description |
|---|---|---|
| Street | Yes | Physical address of the business |
| City | No | City where the business is located |
| State | No | State or province |
| Zip code | No | Postal code |
| Country | No | Country (selector with multiple options) |
| Latitude | No | Map latitude coordinate |
| Longitude | No | Map longitude coordinate |
To get the coordinates, go to the business's Google map, right-click, and select "Copy coordinates." Then paste them into the corresponding fields.
Step 3 — Schedules
Configure the business's operating days and hours.
The system shows 7 cards, one for each day of the week. For each day you can:
- Enable or disable the day for reservations
- Configure the opening time and closing time
You must configure at least one day of the week to be able to activate the business.
The base schedule defines when the business can receive reservations. To block specific dates (holidays, maintenance, etc.), use Schedule Exceptions after creating the business.
Step 4 — Configuration
Configure the reservation parameters for the business:
| Field | Required | Description |
|---|---|---|
| Booking interval | Yes | Bookable periods in minutes (15, 30, 60, etc.). Defines whether customers can book from 6 to 7 or 6 to 7:30, for example |
| Minimum booking lead time | Yes | In minutes. Defines the minimum advance time the customer must book. For example, 60 minutes = customer must book at least 1 hour ahead |
| Maximum booking lead time | Yes | In minutes. Defines how many days ahead the customer can book. Important: To enable Google sync, there must be a difference of at least 32 days between the maximum and minimum (equivalent to 32 days in minutes) |
| Maximum bookings per day | No | Daily reservation limit (optional) |
| Minimum cancellation time | No | In minutes. Defines how far in advance the customer can cancel a reservation (optional) |
| Allow cancellations | No | Enables or disables customers from canceling their reservations (optional, recommended to enable) |
| Allow online reservations | No | Enables or disables reservations from the platform (optional, recommended to enable) |
| Allow last-minute reservations | No | Allows reservations without meeting the minimum lead time (optional, recommended to enable) |
Google Sync
In this section you will find the button to enable Google sync.
While the button is red, the business is not eligible to sync with Google because required information is missing. If you try to enable it, the system will display an error message indicating what information is needed to complete the integration.
Next Steps: Configure Resources
Once the business is created, you will be redirected to the details page, where you will find two tabs: Services and Resources.
Services
The system automatically creates a service called "Free Booking Service" when creating the business. This is the default service for reservations.
Services represent the types of care or provision a business offers its customers. For example, a restaurant may have services like "Dinner," "Brunch," or "Private event"; a spa may have "Relaxing massage," "Facial treatment," etc.
Services are the foundation on which reservations are created: when a customer books, they select the business and the type of service they want. Each service can have its own duration and maximum capacity.
Service Fields
| Field | Description |
|---|---|
| Name | Service name visible to the customer (e.g., "Romantic dinner") |
| Description | Optional detail about the type of care |
| Duration | Estimated service time in minutes |
| Capacity | Maximum number of people per service reservation |
| Status | Active or inactive |
Creating Additional Services
If your business offers paid services or different types of care, you can create additional services:
- On the business's Services tab, click Create service
- Complete the name, description, duration, and capacity
- Save. The service is immediately available to receive reservations
Services work together with business resources: the service defines what is offered (type of care, duration, capacity), while the resource defines with what physical element it is delivered (table, booth, room).
Resources
Resources are the business elements that are reserved for a period of time. For restaurants, resources are tables. For spas, they can be massage therapists or rooms. For barbershops, they can be barbers.
You must create at least one resource for the business to be able to receive reservations.
Creating Resources Manually
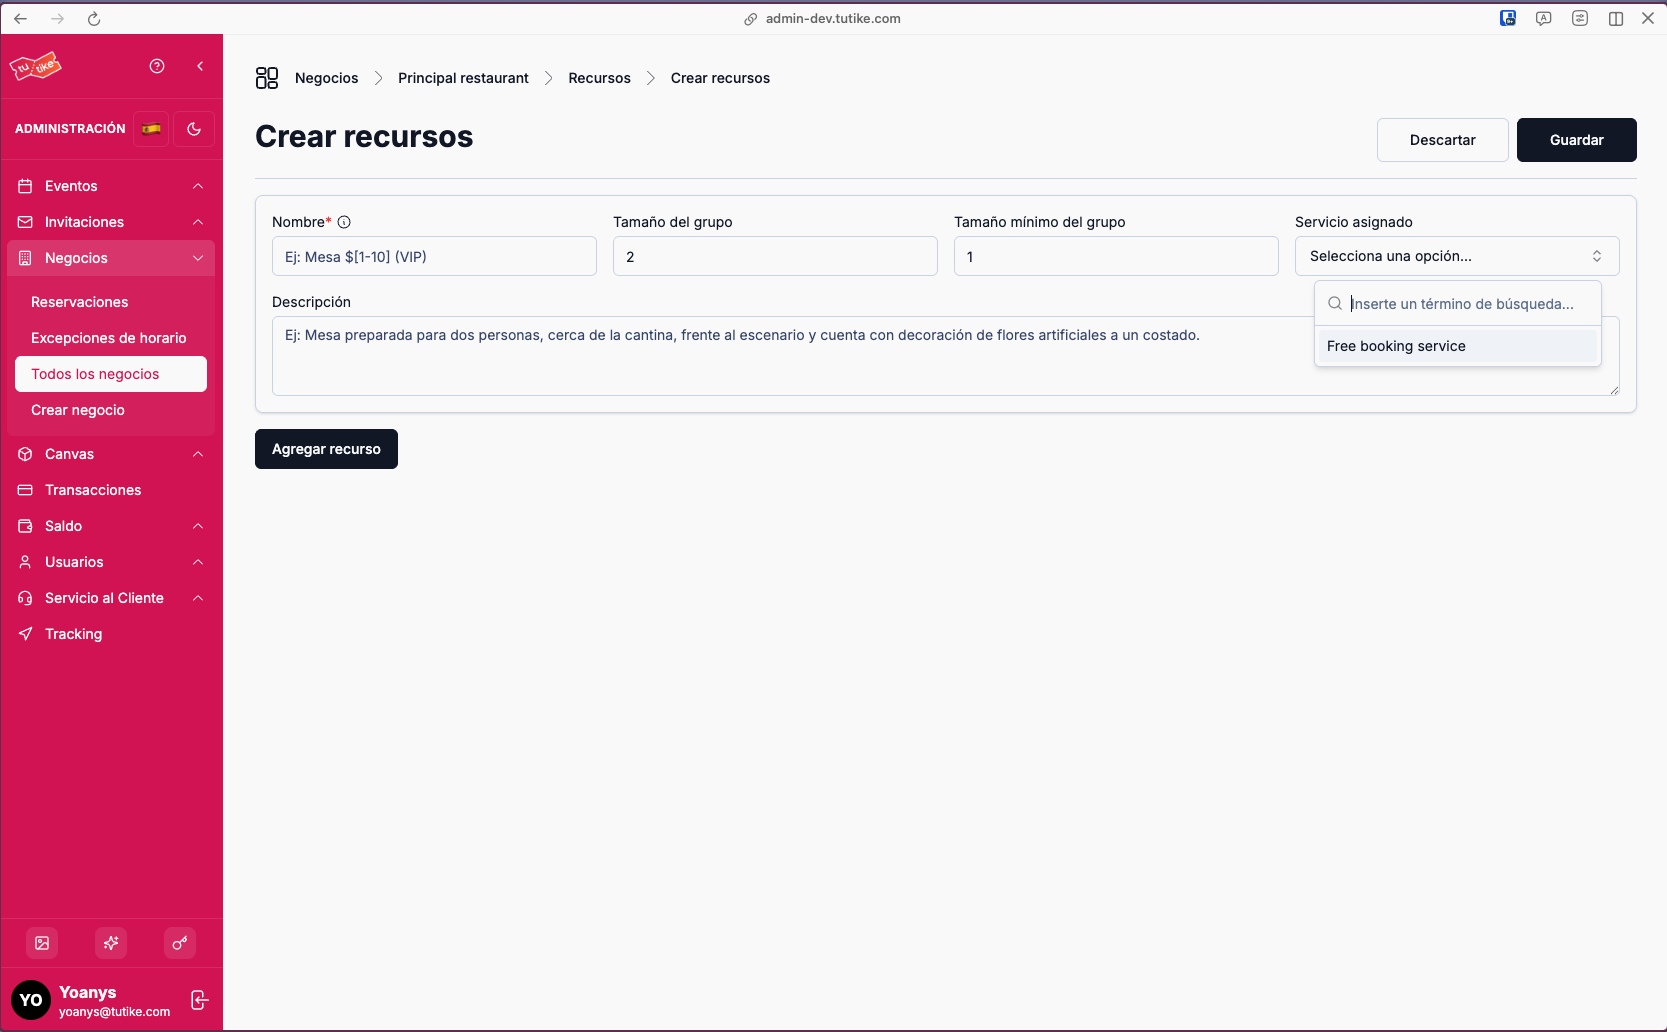
If your business does not have a configured map, you can create resources manually:
Click "Create new" to add resources. The form includes:
| Field | Description |
|---|---|
| Name | Resource name. For restaurants: table 1, table 2, table 3, etc. For spas: massage therapist or room name |
| Group size | Resource capacity. For tables: number of people it can accommodate (2, 4, 6, etc.) |
| Minimum group size | Minimum number of people to book this resource. For example, a table for 4 people can accept minimum bookings of 2 people |
| Assigned service | Service associated with the resource. By default, selects "Free Booking Service." If you have created paid services, you can assign them here (e.g., a massage therapist who charges $50 per session) |
| Description | Resource description (optional, for internal reference) |
Creating Resources in Series
To make it easier to create multiple similar resources, you can use patterns. For example, if you type "table 1-10", the system will automatically create table 1, table 2, ..., table 10 with the same group size characteristics.
To add more resources, click "Add resources" on the same page to create a new card with additional resources.
Importing Resources from the Map
If you have already created a business map in the Canvas section, you can import resources automatically:
- Go to the Resources section
- Click "Import resources"
- Select the map you want to import
- The system will automatically create a resource for each table/element on the map, with the capacity configured for each element
When importing resources from the map, you will be able to see in the reservation map which table was automatically assigned to each reservation based on the customer's group size, and make adjustments intuitively by dragging and dropping.
Resources List
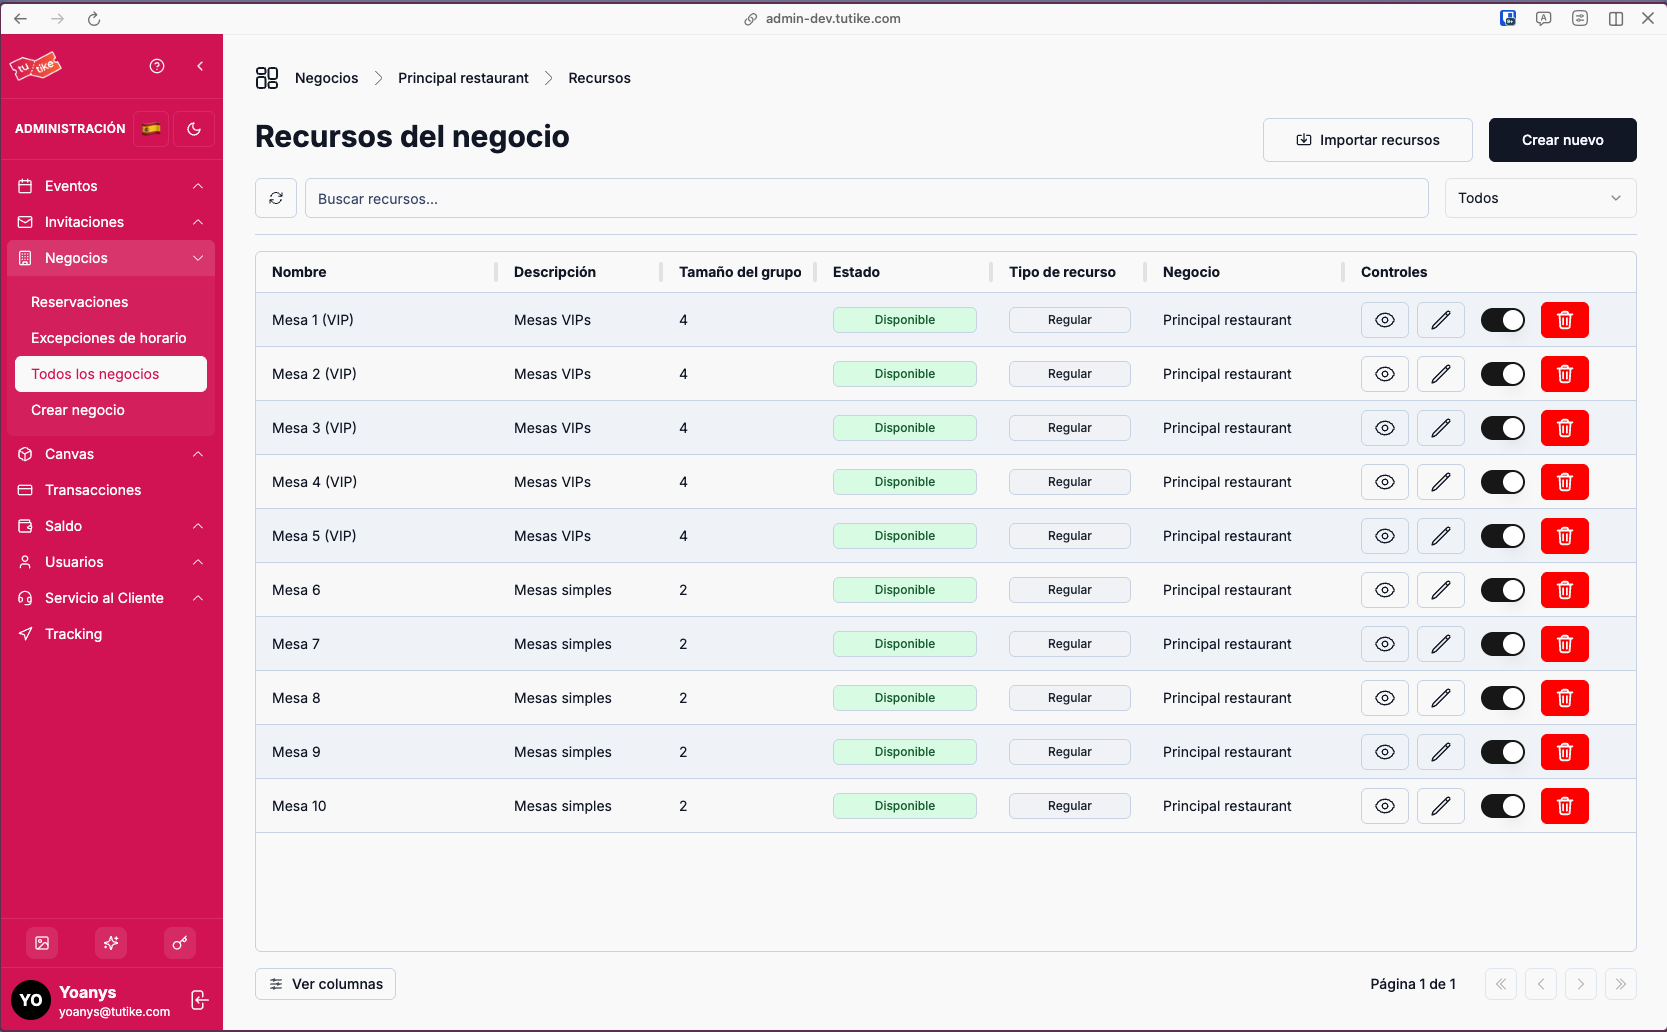
Once resources are created, you will see the complete list with:
- Search bar — Search resources by name
- Table with columns:
- Name
- Description
- Size (capacity)
- Status (active/inactive)
- Resource type
- Business
- Controls
Resource Controls
From the table you can:
- View details — Check the complete resource information
- Edit — Modify the resource data
- Delete — Remove the resource (verify it has no active reservations before deleting)
- Activate/Deactivate — Enable or disable the resource temporarily
The activate/deactivate option is useful for managing variable availability. For example, if your restaurant has more tables available on weekends, you can activate the extra tables on Fridays and Saturdays, and deactivate them on weekdays without needing to continuously create and delete resources.
Resource availability determines how many simultaneous reservations the business can absorb in the same time slot. Without configured resources, the business cannot receive reservations.